Showing posts with label diyproject. Show all posts

Sunday, October 15, 2023

She's not a Lazy Susan...She's a Puzzle Susan!

So named by my niece, this Puzzle Susan sits atop a card table and swivels when you need to sort pieces that are out of reach. If you want to make one, here are the directions and some photos.


Supplies:


1. Order a Lazy Susan, 18 Inch Plastic Rotating Turntable (Icasa brand with Steel Ball Bearings, ABS+PC Material, 66 lbs Capacity) from Amazon.

2. Lowes will cut a 4x4x 1/2 sheet of plywood down to 36 x 36 inches. Pick up two 8ft by 3/4 inch pieces of pine trim for the edges. You will also need a small can of Minwax Wood Finish, color of your choice. 

3. Amazon also sells 36x36 pieces of green felt, wood glue, and spray glue.


Steps:

First, paint the underside of the plywood.


Second,
cut the first piece of trim to size by holding it in place and marking where to cut with a pencil--you're making a beveled miter joint. Remember to adjust your cut for the kerf--carefully sized trim will make great looking corners.

Third, glue and clamp the first piece of trim onto the plywood. Gluing tip: Put strips of clear packing tape under the edges when gluing. This enables easy separation once the glue has dried. Here's a photo of how I clamped the trim to the plywood.


Fourth, rotate the plywood and repeat steps two and three above (three more times). It's important to cut and glue the pieces individually so you can measure against the previously glued piece of trim for accuracy

Fifth, stain the trim with Minwax Wood Finish. If you prefer, you can paint the trim (I recommend a gloss finish).

Sixth, glue the felt to the board. Use spray glue for this step. Fold half over, spray glue on board and the back of the felt; fold other half and repeat.


Sixth, attach Lazy Susan hardware to the bottom -- and it's done!


Next -- add puzzle.


Tuesday, April 27, 2021

Preparing for a New Puppy

2 Problems: 

    1. How do we block off the kitchen in preparation for a new puppy? 

    2. The backyard fence is falling apart.

Solution 1: I used plastic lattice from Home Depot to create the right sized gates for our space. It took one 8 x 4 sheet of lattice to make these gates (see photos below).


Hooks and eyes in the back keep the gates secure, and there is no hardware on the front side. The gates are light and easy to unlatch and move.


And there were enough leftover scraps to made this portable stair-blocker.


Solution 2: I replaced the fence with post and rail and new gates. Also checked the perimeter and repaired gaps in the fence.

Before...


Along the way and after...


So far, they work!


Sunday, March 21, 2021

Caning a Small Chair

This is my third caning experience. I'm getting better at seeing mistakes--hope that means my skills are improving.


Pandemic passtime...


Saturday, February 27, 2021

My Second Caning Adventure

I finished the corner chair two years ago and recently turned my attention to this bent-wood rocking chair. You can view photos of the deconstruction and the finished corner chair in my 2019 post, Can I Cane a Chair?


Honey, an elderly Norwich Terrier, is my caning companion.


A rolled up piece of cane is soaking in the purple tub for about 10 minutes before I can use it. I found clothes pins helpful in keeping the the roll under water.


It was so exciting to get to this final stage of adding the edge over the holes in the seat. At this point I was seeing the cane pattern on the backs of my eyelids whenever I closed my eyes!


Completed project--not perfect, but it'll do.


Tuesday, December 8, 2020

Frame Earring Holder


I decided to make frame earring holders for my two granddaughters--why not display earrings instead of letting them get lost in drawers? The display helps keep track of jewelry and it looks cool as it fills up.

 Here are the steps and photos of the completed (easy and fun diy) project.


1. Yard sales are a great place to find picture frames, and I had two that fit this project perfectly. 


2. I found 1/4 in. 23-Gauge Galvanized Steel Hardware Cloth at Home Depot. A 2 ft. x 5 ft. roll costs just under $10. Measure, cut, and staple into the back of the frame. 

Note: Be careful when stapling into the back of the frame. The frame on the right above has a white (wood putty) milk paint border because my staples showed through the front. On the second frame, I bent the wire "cloth" so I could staple into the side (thicker part) of the frame.


3. This is my favorite part, mainly because I enjoy using my pneumatic upholstery staple gun. Cut pieces of fabric to use as a background behind the wire. Staple it to the back of the frame.


4. So now the frame can hold earrings with hooks, but what about the ones with posts on the back? I added a strip of jute seat webbing by weaving the purple ribbon through it and the wire mesh (a curved upholstery needle worked well here). Posts can easily poke through the jute, and it is sturdy enough to hold lots of earrings.


5. Add wire to the back for hanging, and if you zoom in on the photo you can see the 1/2 inch clear bumpers I added to the bottom two corners.


And here's a front view of both frames, completed.


Wednesday, August 5, 2020

Kayak Rack Project

New project: I built a kayak rack for four boats. I built it under our existing deck. Will add hooks on the sides to hang two ladders.


Added hooks to the sides to hang ladders:


Monday, July 15, 2019

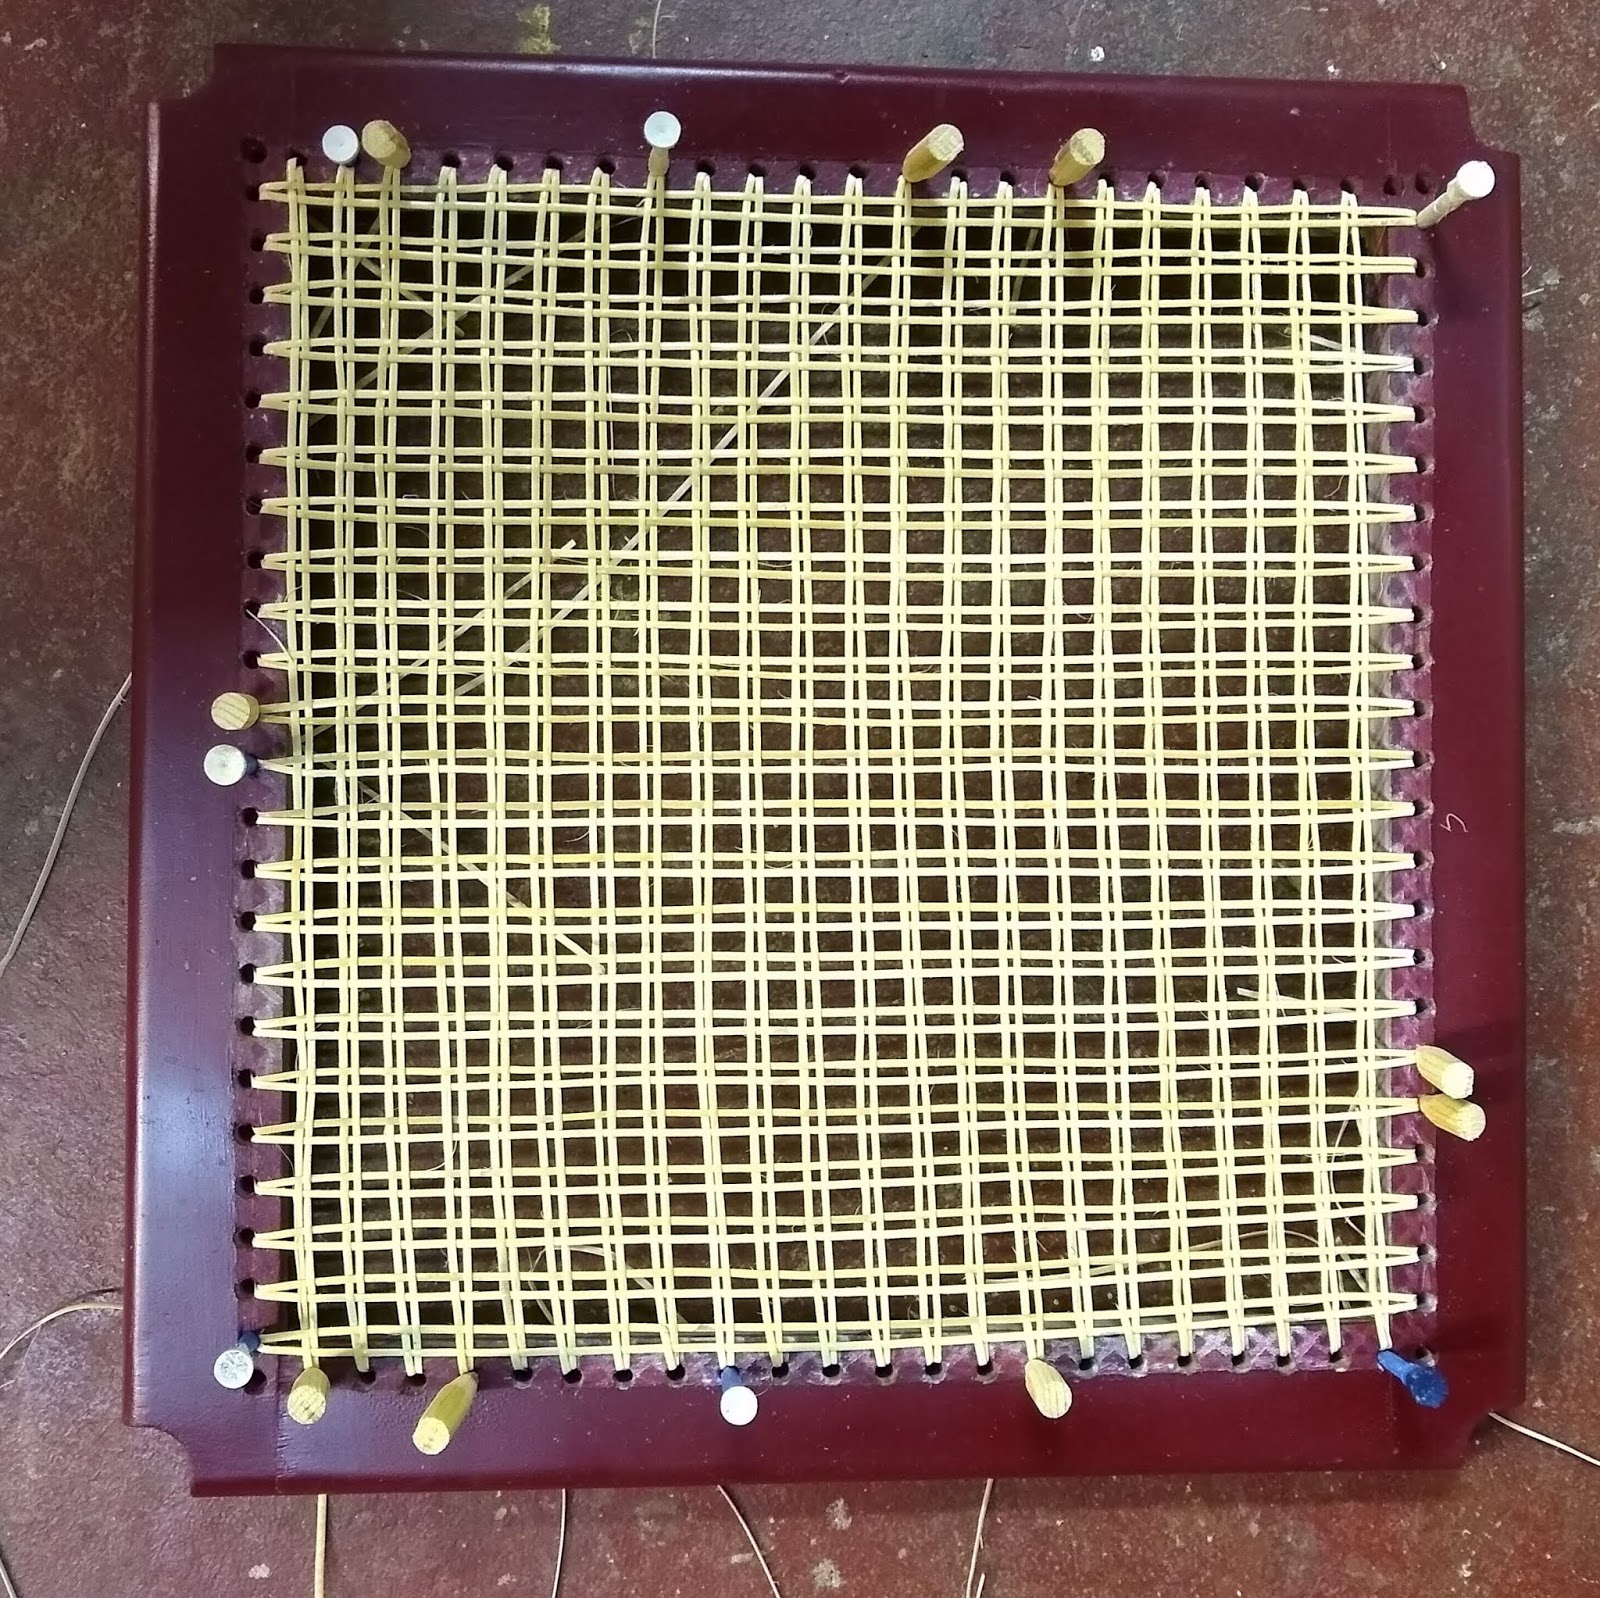
Can I Cane a Chair?

It's time to learn how to cane chairs.


So far I'm learning a lot from Peerless Rattan, and while I'm waiting for supplies to arrive, I'll take the old caning out of the rocking and corner chairs, and reglue the loose connections in the corner chair.


Old caning removed, chair wiped down, coat of walnut Restore a Finish applied: ready for new caning.


Took the old cane off a third chair. Opened the loose connections and reglued. Painted the corner chair and small arm chair with Rustoleum, Satin, Claret Wine color. I also decided to add 4 angle supports to the corner chair for more stability.


Question: would it be easier to cane the back of the rocker with the piece detached or should I screw it back on the chair first? Fixing a table while I wait for the cane to arrive. 

Found a drying rack to hang my strand cane. 


Decided to begin with the red corner chair because the seat is square and removable. I'm getting help from a very clear YouTube video: Weaving a Cane Seat Using the 7 Step Method created by Ed and Cindy Hammond. Here's a phot0 of beginning Step 1:


Step 1 completed:


Step 2 completed:


Step 3 completed and Step 4 started:


The perfect combination: tedious step 4  and day 2 of the British Open.


Step 4 done!


Photo of Step 5 completed:


Step 6 done, on to Step 7--binding the edges.


Finished project: