Wednesday, July 6, 2016

Hazel helps me replace the refrigerator circuit board…


So, our refrigerator started making strange clicking noises. The inside display light went out at the same time. A few minutes later, the clicking stopped, and all returned to normal. The problem was intermittent over the course of a few days.
I went online to see if I could figure out a solution, short of buying a new refrigerator when this one eventually stopped working altogether. A combination of “how to” blogs and YouTube videos provided me with just the information I needed, and I learned that the main control board was dying. The experts online informed me that I could replace the circuit board myself.  Back to the web I went to find out the part number and where I could buy the replacement.
I ended up going to All Brand Appliance Parts –they had the exact part I needed, and the man who helped me was friendly and knowledgeable. While I could have ordered the circuit board online–and saved $10–I decided it was better to support the local economy (and get the job done sooner). 
It wasn’t hard to replace the board. One of the most helpful tips I learned from an expert online was to take a picture of the dying circuit board before I removed it so that I would have a reference as I plugged the connections into the new board. All went well, and I am glad to report that as I sit at the kitchen counter and write a day later, I continue to hear only the comforting, normal hum of the refrigerator.
But I wondered what to do with the circuit board I removed. It bothered me to think of throwing it out because it is a cool, complicated piece of technology that still worked–partially. I decided to get in touch with a friend who teaches high school science, and I was delighted to find out that he wanted it for both his electrical engineering and applied physics classes.
Great service at All Brand Appliances, no more clicking, I cleaned behind the refrigerator, and students get to tinker with the old board I almost threw away–an all around happy ending. 

Monday, May 9, 2016

Restoring a Dining Room Chair


This chair belonged to my wife's family, and it was made in 1950.


The following photos show some stages of restoring the chair.


Saturday, March 5, 2016

Footstool Reconstruction


Here's where I left off at the end of 
Below are photos of putting the footstool back together again.


Thursday, March 3, 2016

Cherry Chair Project

Finally finished a project that stalled at various stages for nearly a year! This chair belonged to my parents, and, as you can see, the leather seat was shot and the veneer on the arms was worn away.

Before...


Deconstruction...


Lots of nails and tacks to remove.


Taking photos along the way provides helpful visual reminders for later reconstruction.


Reconstruction...


Re-glued the loose corner supports and arms.


Added a coat of cherry Restore a Finish on all the wood that shows.


I stretched webbing across the seat bottom and covered it with burlap. Then I added the edge roll for seat support.


For this project I chose 2 inch thick, high density foam, a small piece to provide extra cushioning where the rear end hits the chair covered by a larger section.


Next, a large piece of 1 inch Dacron covered the foam.


By carefully stretching, tacking, and stapling the muslin over all of the padding, I molded the seat close to its original shape.


Cutting the fabric to fit the corners was a challenge. Also, final nailing so that I did not end up with fabric bulges in the corners was tricky. I had to pull nails and restart a few times. I started nailing in the back, then each side, and finished with the front.

  
Finished project... 


Friday, February 12, 2016

Three Kitchen Projects: Making Space

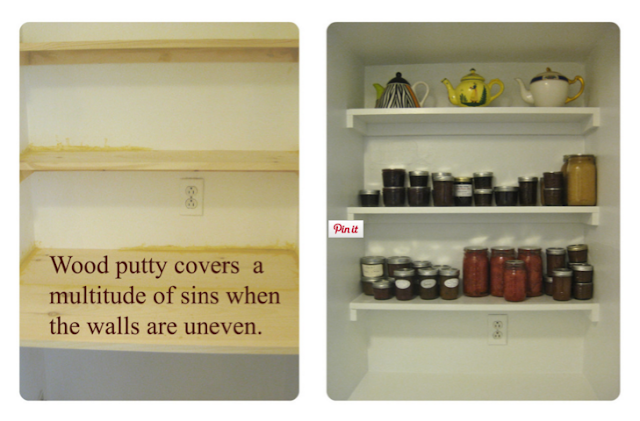
These three kitchen projects include pantry shelves, a baking dish holder, and a solution for organizing measuring spoons and cups.


We'll begin in the Pantry.


Underneath the main shelf is room  
for a small fridge.


This baking dish shelf has improved access to the dishes we use most often.


I was intrigued by a Pinterest post that suggested hanging measuring spoons and cups on the inside of kitchen cabinet doors for easy access. The noise of the cups bouncing against the door would be irritating, so I am experimenting with a different solution.


Wondering if this will be a problem...